- Home >
- Web Help >
- SeekerWorks™ >
- People - Volunteers/Ministries
People - Volunteers/Ministries
In SeekerWorks™, the term ministry is used to describe all of the various areas in the church where volunteers and staff serve the church.
The "List Of Ministries" screen (shown below) appears when you click the (Volunteers/Ministries) menu button.
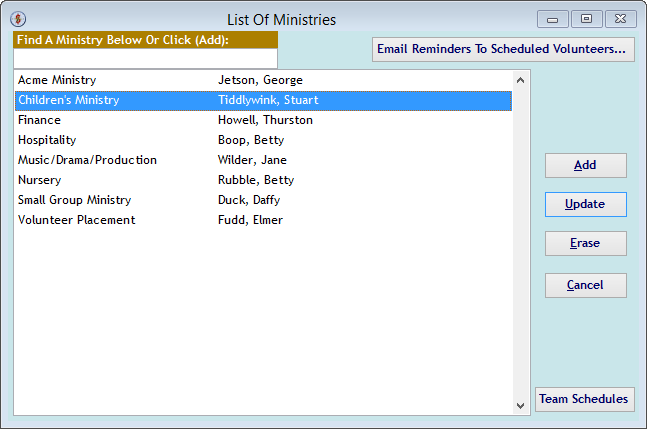
The "List Of Ministries" screen shows the name of the Ministry and the name of the Leader(s) for that ministry. Click a Ministry name to (Update) it, or click (Add) to create a new Ministry. Once you've defined everything for that ministry and linked all of the volunteers to it, use the (Team Schedules) button to schedule your volunteers or the (Email Reminders To Scheduled Volunteers) to send out emails to everyone scheduled during the next 7 days.
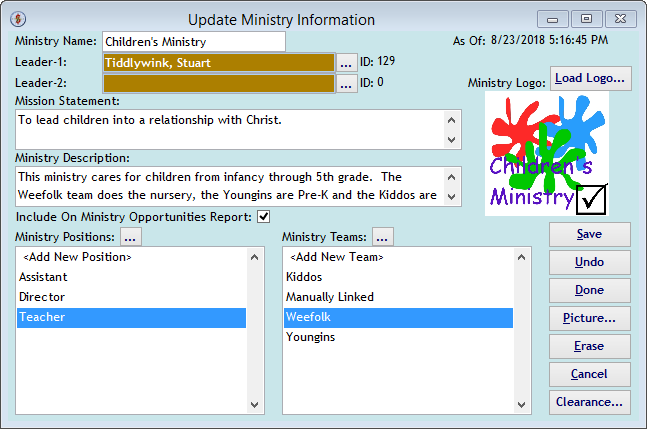
The "Update Ministry Information" screen appears when you click a Ministry name or the (Add) button on the "List Of Ministries" screen. Give the ministry a unique name and use the (...) button next to the Leader-1 or Leader-2 values to link a person to those values. There's a spot for the Ministry's Mission Statement and another for a Description of what the Ministry does or who they care for. Use the (Load Logo...) button to include the Ministry's logo. Check the 'Include On Ministry Opportunities Report' check box if you want to advertise volunteer opportunities to those interested. (Save) the information, then click the 'Ministry Positions (...)' button or the '<Add New Position>' position to add a new position for the Ministry or click on a position in the list to update its information and link volunteers to it. Once done, click the 'Ministry Teams' (...) button to add a Ministry Team and link those volunteer/position assignments to it. Lastly, use the (Picture...) button to load or take a picture of the Leader(s) of the ministry or the (Clearance...) button to indicate who has been cleared to work with the ministry per their background check.
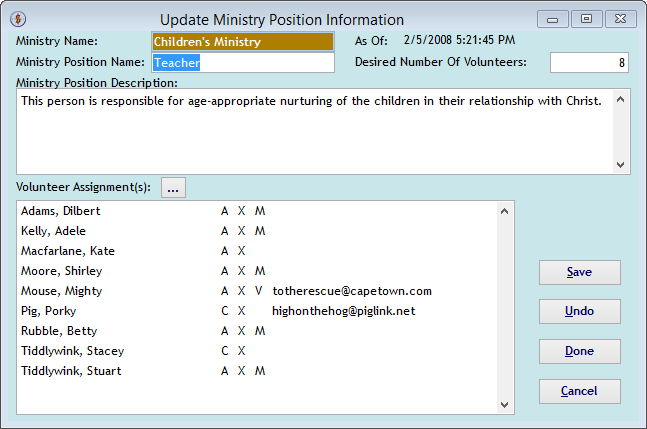
The "Update Ministry Position Information" screen defines a position within the ministry with a unique name, a description of role the position plays in the ministry and the total number of volunteers desired for that position, which appears on the Ministry Opportunities Report. (Save) the position information, then use the 'Volunteer Assignments (...)' button to link people to the position.
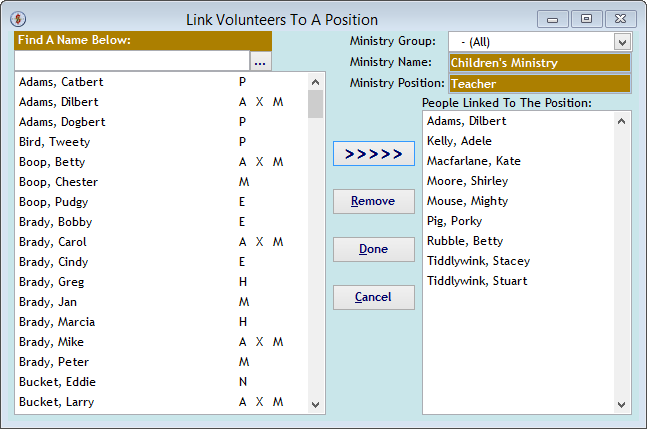
The "Link Volunteers To A Position" screen links people to the position. Click a name on the left to link a Person to the ministry position, or click a name on the right to remove that Person from the position. Use the 'Find A Name Below' text box to reposition the list or the 'Ministry Group' drop-down list filter to pare the list down to names in the Ministry Age Group. Click (Done) to save the assignments.
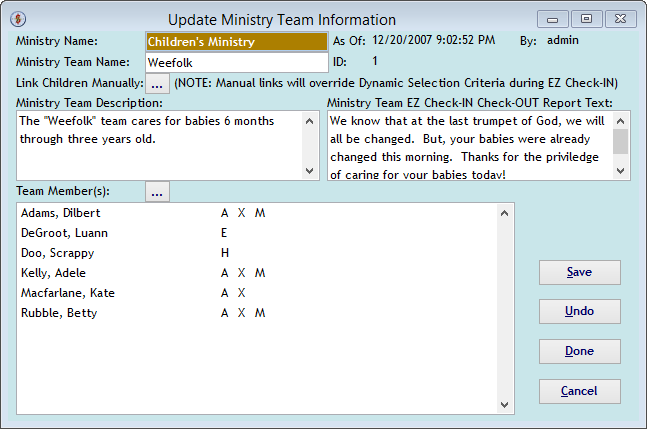
The "Update Ministry Team Information" screen defines a team within the ministry with a unique name, a description of role the team plays in the ministry and text to use on the EZ Check-OUT Reports. (Save) the Team information, then use the 'Team Member(s) (...)' button to link volunteer/position assignments to the team. You can also use the 'Link Children Manually (...) button to manually assign which child goes to which Ministry Team during the the EZ Check-IN process (screen shown below).
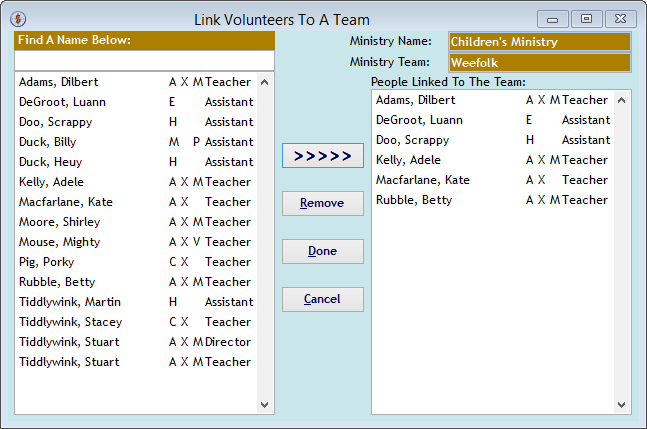
The "Link Volunteers To A Team" screen links volunteer/position assignments to this Team. Click an Assignment on the left to link a Person to the ministry team, or click an assignment on the right to remove that Person from the team. Use the 'Find A Name Below' text box to reposition the list. Click (Done) to save the assignment links to the Team.
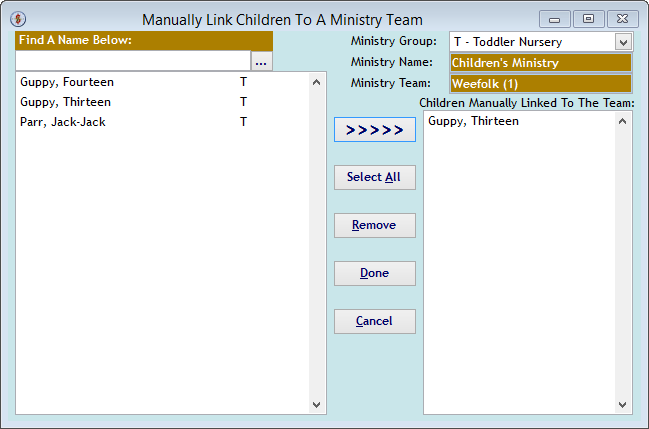
When using the EZ Check-IN process, normally children are dynamically assigned to a Ministry Team based upon that team's selection criteria and Ministry Age Group linked to it. In some cases, you may want to manually link some children to one Ministry Team to prevent them from being automatically assigned to a different team, such as with special needs or to keep siblings together. In that case, the "Manually Link Children To A Ministry Team" screen is used to create these manual links. Click a name on the left to link a Person to the Ministry Team, or click a name on the right to remove that Person from the Ministry Team. Use the 'Find A Name Below' text box to reposition the list or the 'Ministry Group' drop-down list filter to pare the list down to names in the Ministry Age Group. Click (Done) to save the manual links.
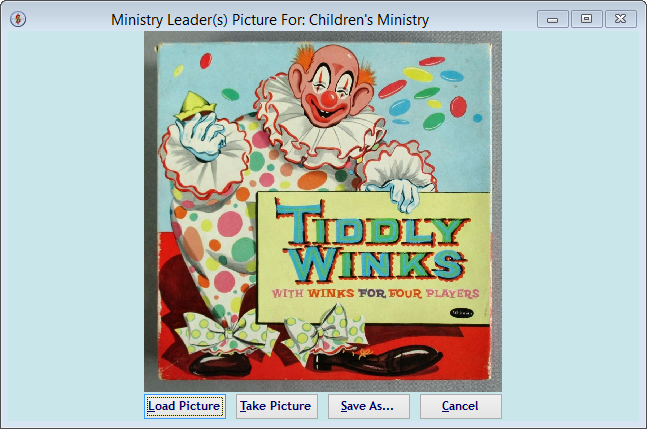
The "Ministry Leader(s) Picture For: xxxxx" screen is used to load or take a picture of the Leader(s) of the Ministry. Or, use the (Save As...) button to save the picture to your computer.
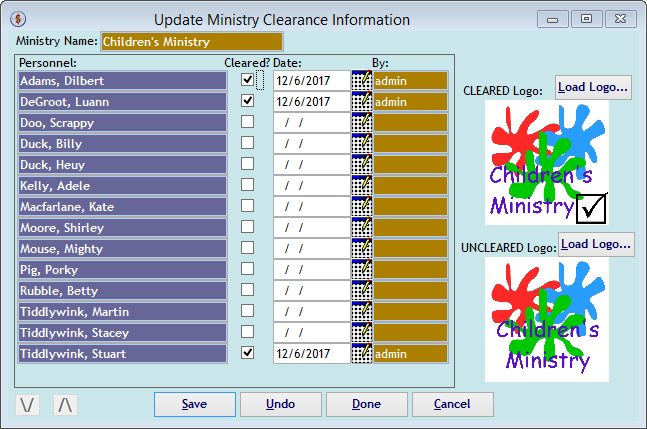
The "Update Ministry Clearance Information" screen is used to keep track of who has been cleared through a background check to work with children or handle finances and data. Check the box next to the person after they've been cleared and indicate the date associated. If you're using Volunteer Check-IN with the EZ Check-IN process, cleared names will see the Cleared Logo printed on their name tags, while those who have yet to be cleared will see the Un-cleared logo printed on their name tags. This provides a quick way to identify who is authorized for certain actions, such as taking kids to the bathroom, and who is not. Use the (Load Logo...) buttons to load the respective logo to the Ministry.
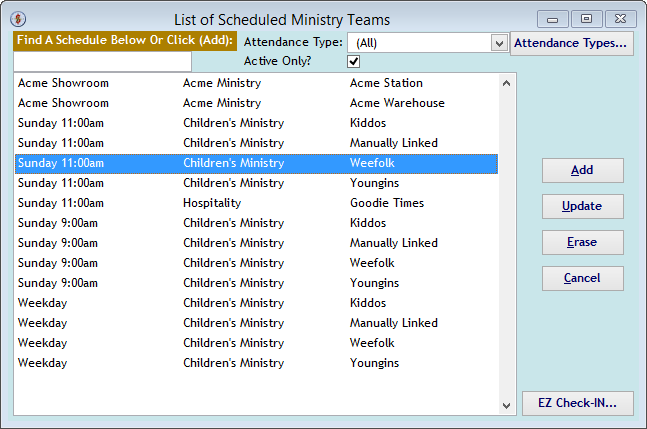
The "List Of Scheduled Ministry Teams" screen shows the Attendance Type/Ministry Name/Ministry Team combinations that have been scheduled for volunteer service. Click one of the rows to (Update) its schedule, or click (Add) to create a new schedule. Use the 'Attendance Type' drop-down list to filter the list to one Attendance Type or the (Attendance Types...) button to add new types. Use the 'Find A Schedule Below' value to reposition the list. Or, click the (EZ Check-IN...) button to start the EZ Check-IN process.
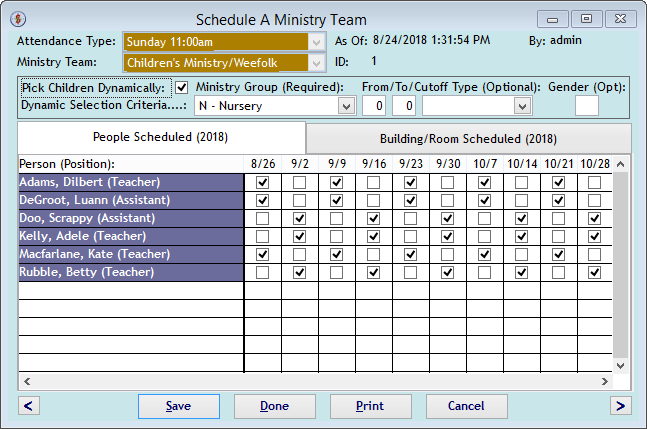
The "Schedule A Ministry Team" screen is used to schedule when a volunteer/position assignment for service, based upon an Attendance Type and Ministry Team combination. Check the 'Pick Children Dynamically' box to assign all of the children in one particular Ministry Age Group to this Team. Optionally, you can further refine that criteria to From/To Cutoff Values by {Months Old, Years Old, Grade} and/or Gender {M or F}. The {People Scheduled YYYY} tab shows all of the volunteer/position assignments linked to the Team and a check box for each possible day in the future they could volunteer this year. Using the (<) and (>) buttons, you can go backward or forward in time. Remember to (Save) your information. Then use the (Print) button to see the 'Volunteers Scheduled By Team' Report (shown below).
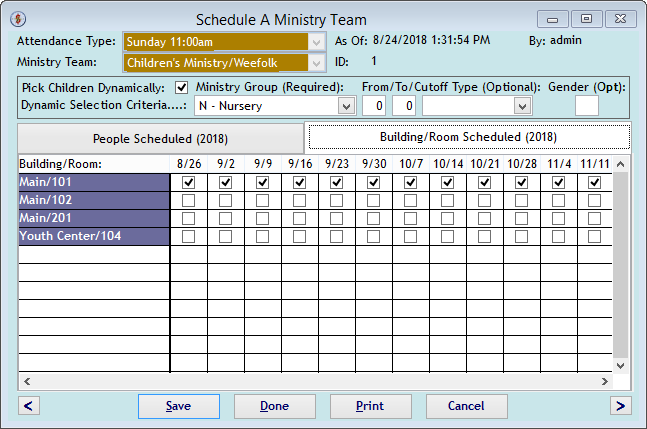
The {Building/Room Scheduled YYYY} tab is used to schedule the Building and Room the Team will be using for each possible day in the future this year. Using the (<) and (>) buttons, you can go backward or forward in time. Remember to (Save) your information. When using the EZ Check-IN process, these Building/Room assignments print on the name tags and reports to aid the people in finding the room to be used for the kiddos.
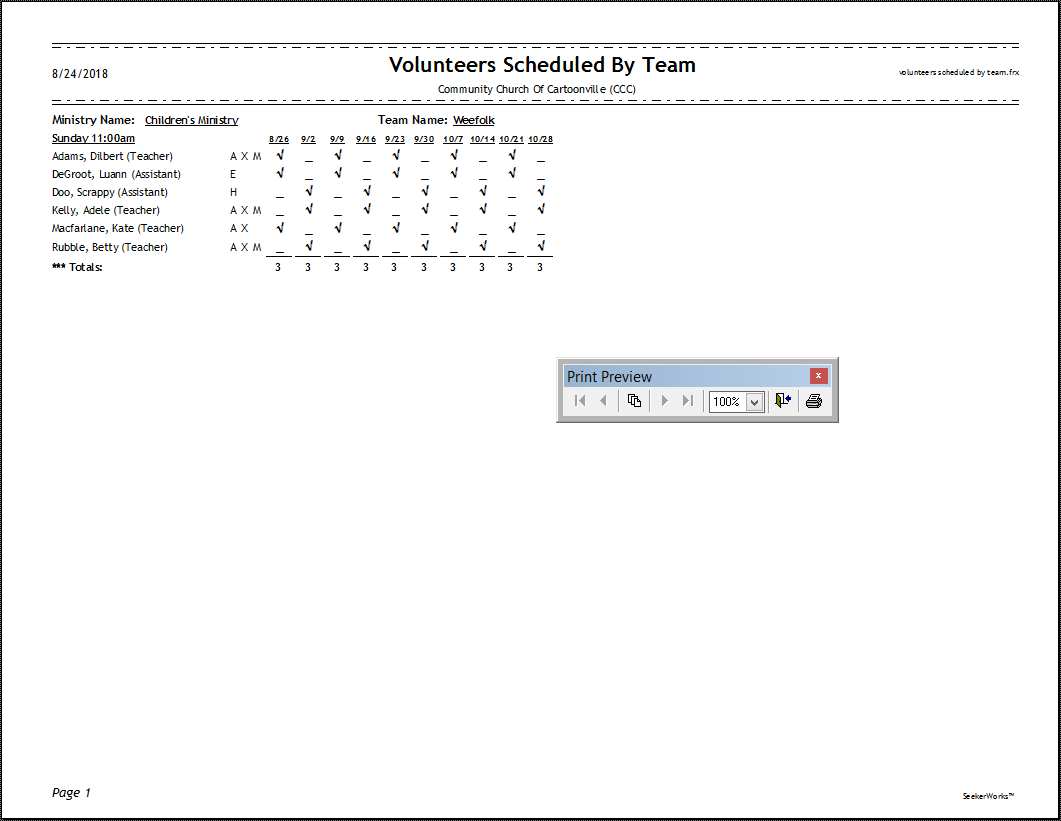
The 'Volunteers Scheduled By Team' Report shows who is scheduled when in what role for the Attendance Type and Ministry Team combination.
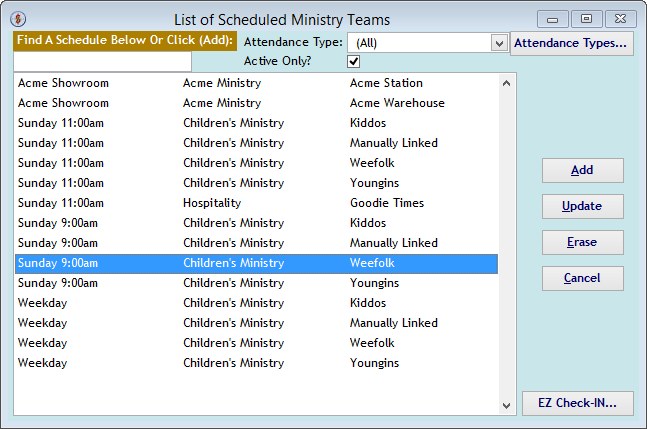
Here's a second example of the "List Of Scheduled Ministry Teams" screen.
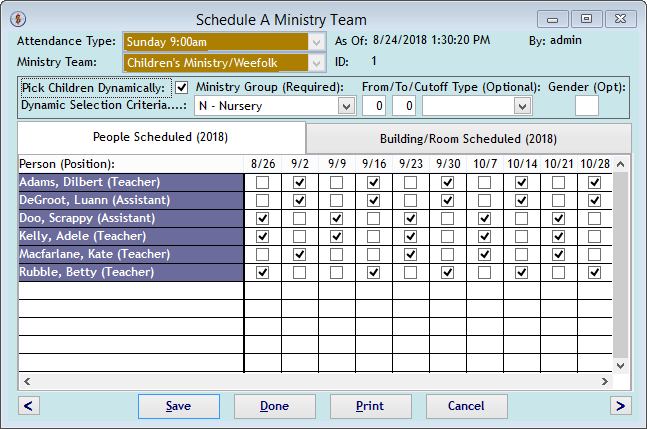
Here's a second example of the "Schedule A Ministry Team" screen, {People Scheduled YYYY} tab.
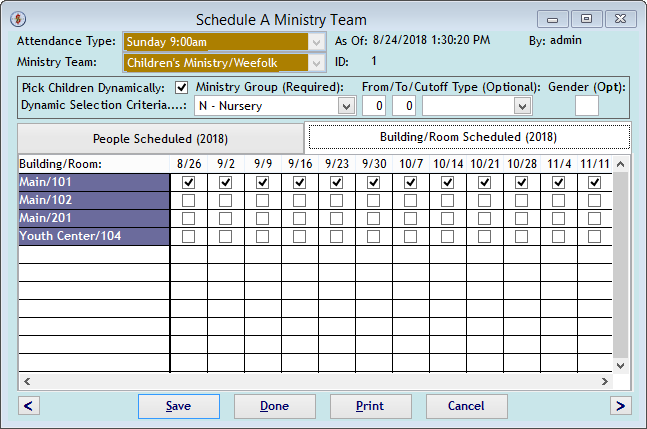
Here's a second example of the "Schedule A Ministry Team" screen, {Building/Room Scheduled YYYY} tab.
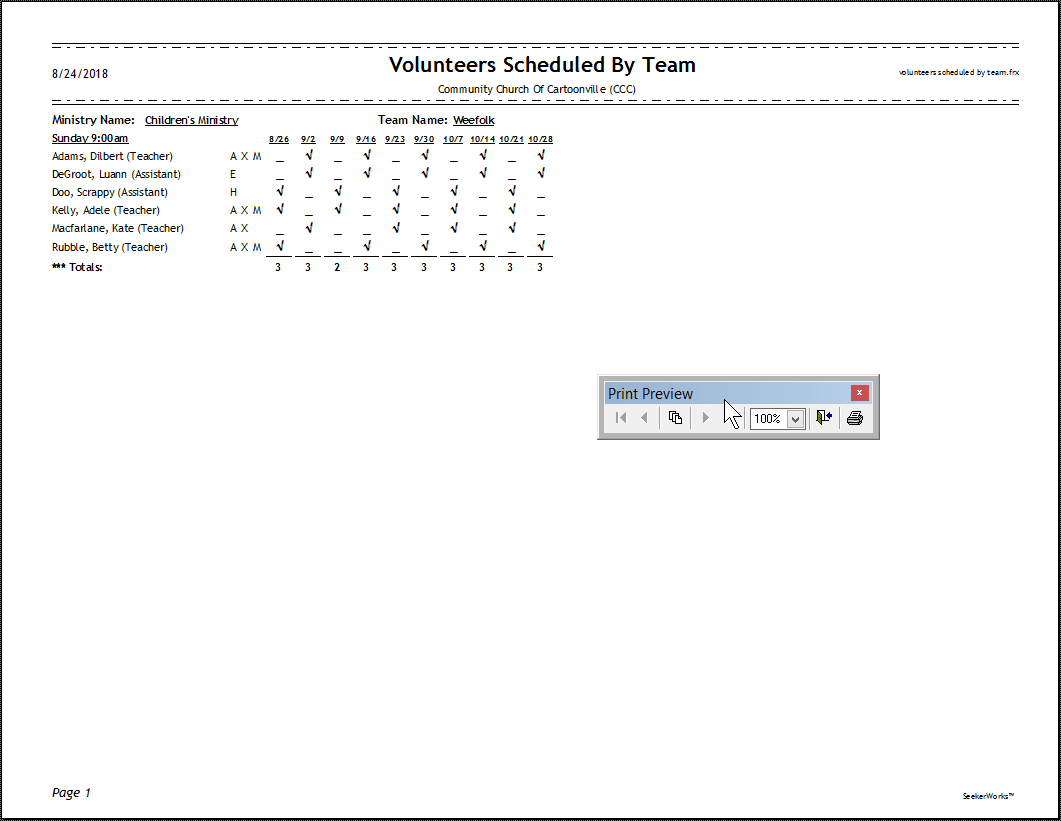
Here's a second example of the 'Volunteers Scheduled By Team' Report.
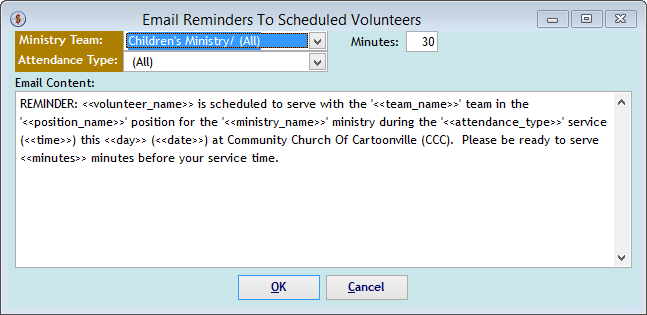
When you click the (Email Reminders To Scheduled Volunteers) button on the "List Of Ministries" screen, this "Email Reminders To Scheduled Volunteers" screen appears, giving you options of what you want the message to say. The default message is shown above. The substitution parameters will be replaced with the volunteer's or team's actual values, as appropriate. This message will be sent to everyone indicated by the Ministry Team and Attendance Type criteria who is scheduled during the next 7 days. Click (OK) to create all of the emails.
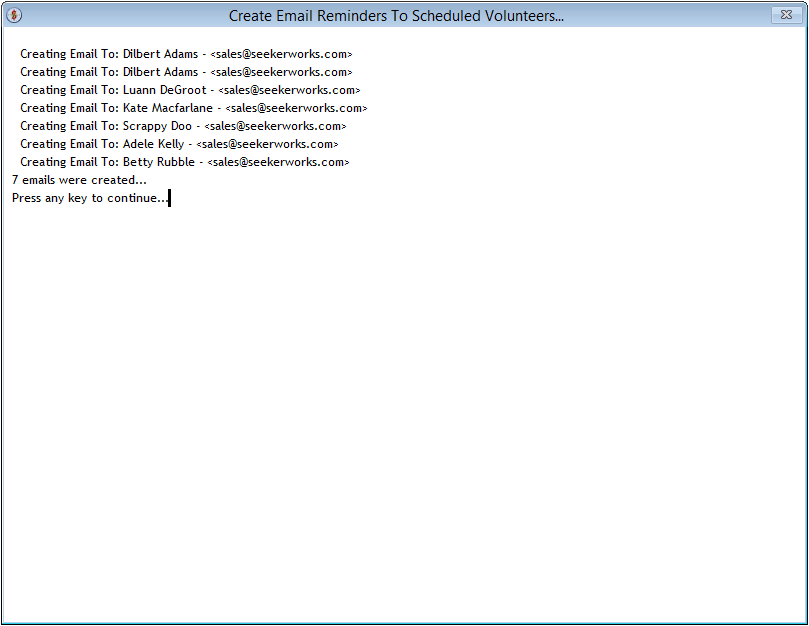
The "Create Email Reminders To Scheduled Volunteers" screen shows the progress of the email creation. Once you respond to the 'Press any key to continue...' message, the "Email History" screen will appear (shown below).
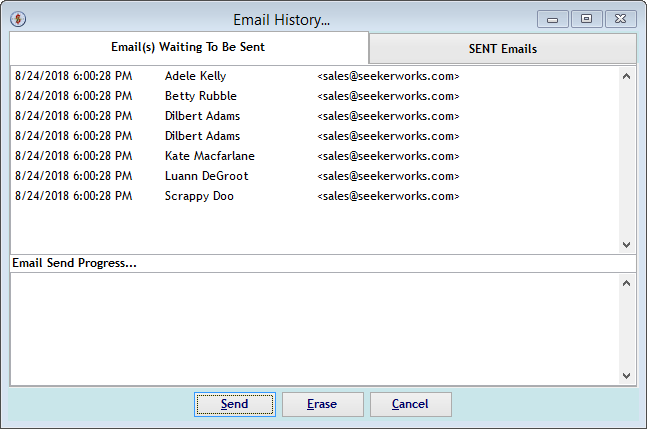
The "Email History" screen shows the emails you created, still waiting to be sent. Click the (Send) button to start sending the emails. The 'Email Send Progress...' area will show each email as it is sent. Or, <right-click> an email and click (Erase) if you decide not to send it. The {SENT Email} will show you all of the emails after they are sent. Click an email to review its contents.
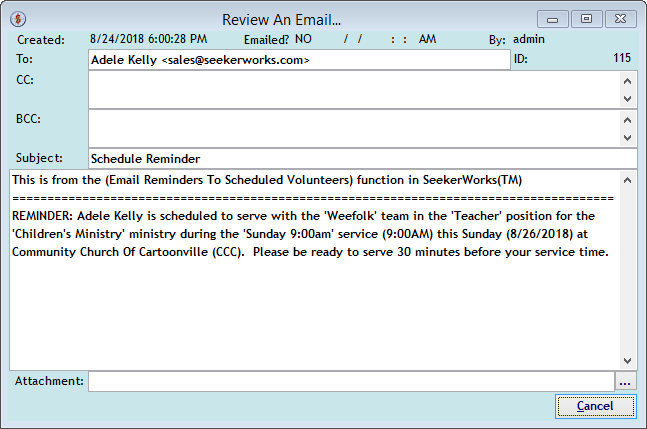
The "Review An Email..." screen shows a selected email's information.
Right side navigation links:
More Screens:
People:
Volunteers/Ministries