- Home >
- Web Help >
- SeekerWorks™ >
- People - Names/Address
People - Names/Address
Reaching people for Christ is what the church is all about. As such, all of the Names and Addresses for people in the church need to be easily accessible as well as accurate, since these records are the basis of all other information within SeekerWorks™. An Address groups one or more names into a 'household' and are assigned a Household ID (or HID for short). Each name is linked to an address and also assigned a unique identifier, simply referred to as 'ID'.
The "List Of Names" screen (shown below) appears when you click the (Names/Addresses) menu button.

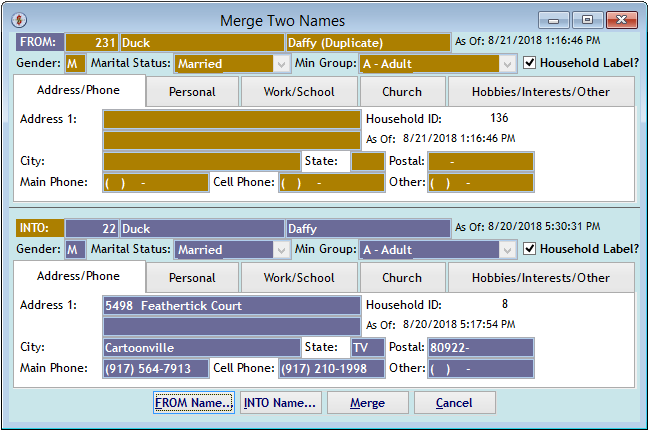
Reposition the list by typing a value in the 'Find A Name Below...' input field (top-left, e.g., "du"). As you type, the list moves to the first or last name less than or equal to the Find value. To sort the names, click the 'Sort By' drop-down list to select {By Last Name/First Name, By First Name/Last Name, or By Postal Code/Last Name/First Name}. To filter the names, pick one of the ' Ministry Group ' values or check the 'Exclude Inactive Names' box. If the 'Households' check box is checked and you click a name (or <right-click> a name and click (Add) or (Update), or the (Household) button), the "Update A Household" screen appears with all of the names of everyone in that household (shown below). If it is un-checked and you click a name (or <right-click> a name and click (Add) or (Update)), the " Update A Name/Address " screen appears for the name selected instead (also shown below). <Right-click> a name and click (Erase) if you want to remove a person and everything related to them from the database. Use (Merge) to combine two duplicate names into one person, if necessary. <Right-click> the duplicate name first (e.g., 'Duck, Daffy (Duplicate)'), then click the (Merge) button to see the "Merge Two Names" screen (also shown below). Use (Cancel) to go back to the menus.
Also notice that the three 1-character columns between the name and their main phone number, while cryptic, quickly identify the grouping and status of the people. The first column shows the Ministry Group code for the age group they belong to. The second column shows "X" if the person is one of the head(s) of the household. The third column shows whether the person is a Member (M), Probationary Member (P), Visitor (V), Inactive (I) or a regular attender (blank). At the bottom right, you'll see the number of names in the list for the current filter conditions (186 active names) and the line number in that list of the selected line shown (60, meaning there are 59 names above Ralph Drabble, the top name shown in the list).

The "Update A Household" screen updates the Address for the household and each of the people in the household below it. Change the address information once for all of them or change the information below it, then click (Save) or (Done). Use the (...) buttons to pick a different address or name, or to un-link the household from an address. Click the (+) buttons on the right to see the "Update A Name/Address" screen for the name next to the button (shown below). Use the 'Label' column to indicate which names are the Head(s) of the Household and should be combined on a mailing label. Use (Activate All) or (Inactivate All) to un-check or check all of the Inactive? check boxes. Use (Family Picture...) to load a picture or take a picture with a web cam. Use (Follow Ups...) to see all of the Follow Ups (Ticklers) related to anyone in the household. Use (New) to create a new household, or (Cancel) to return to the List Of Names screen above.

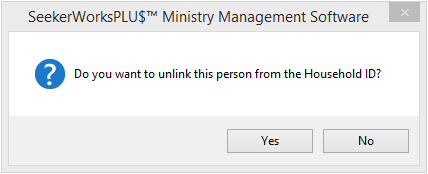
The "Update A Name/Address" screen updates information for one person. There are five tabs containing information about the person, and a list of relationships at the bottom to show who else is in the person's household. The first tab updates the {Address} for the person. Use the (...) button to select a different address from the "List Of Addresses" screen (shown below) and move a person to a different household or to un-link the person from their current household ID. If un-linked, a new household ID is created with the same address information and the person becomes a household of one. Use the buttons at the bottom to indicate what you want to do. Use the buttons along the right side to see or add other information for the person. They show up with a highlighted color if information exists behind the button.

The second tab updates the {Personal} information for the person. Click on the calendar icon to select a Birthdate or Anniversary or type the values instead. If the person's parents are also in the database, use either (...) button to select them from the list of names, which then updates the Parent(s) box with that information. If the person's parents are also the heads of the same household, the Parent(s) value will default to them on the related reports.

The third tab updates the {Phones/Work/School} information for the person. The area codes may default for you from the "Auto Fill Table" (if defined). And, yes, some people still use pagers. If you know where the person works, fill in the Occupation and Employer. If the person attends a school defined with the "School List" screen, you can select it from the drop-down list, then add their Grade (K, 1-12, or C1-C8 for college/university). Your student ministry leader may want to know what time they could meet them for lunch as well.

The fourth tab updates the {Church} information for the person, such as when they first attended, the source of their information etc.

The fifth tab updates the {Hobbies/Interest/Other} information for the person, if known. The 'Other' values can be used to save your specific information about them if we don't already have a place to put it.

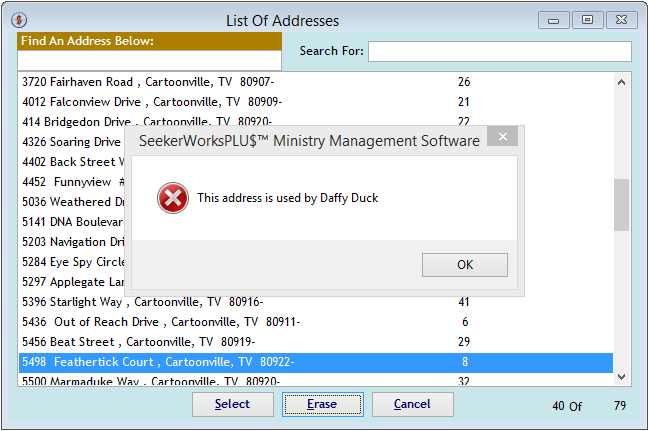
The "List Of Addresses" screen is used to pick an address for a person or household from a list of already defined addresses. Use the 'Find An Address Below' value to reposition the list, starting from that value, or use the 'Search For' value to filter the list down to any address containing that value. The Household ID appears in a column to the right so you know which address applies to which Household ID. The (Select) button sends the selected Household ID back to the screen that you are picking an address for (automatically clicked when an address is <double-clicked>).

The (Erase) button can be used to remove an address from the list (if it is not being used by anyone), or to find out who is linked to that address.

The (Cancel) button is used to un-link a household or person from an address (Household ID). If you then click (No), you will NOT un-link the person/household.

The "Merge Two Names" screen is used to merge the FROM name into the INTO name, combining the two names information and erasing the FROM name. Use the (FROM Name...) button to pick the name to be erased. Use the (INTO Name...) button to pick the name that survives the merge. Click (Cancel) to skip the merge and go back to the "List Of Names" screen shown above.

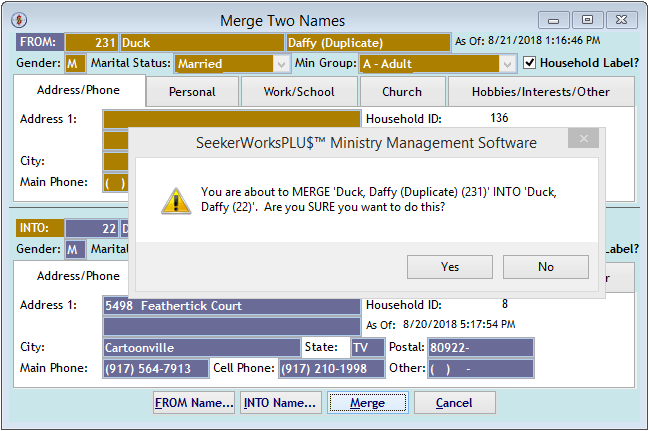
If you are sure you want to merge the names, click (Yes) and the names are updated accordingly.
Right side navigation links:
More Screens:
People:
Names/Address